Many people think block paving begins when the blocks go down. In reality, the fate of a durable pavement — one that stays settlement-free for decades — is decided much earlier, in the preparation of the ground. The seven steps below walk you through what to watch if you want the result to look good not just in the first summer, but ten years on.
1. Design and setting out

Before you put a spade in the ground, draw the surface you are going to pave. Mark the direction of the fall — this is crucial, because water must always flow away from the building. As a general rule, allow a fall of 1.5–2 cm per metre; with the torrential rain a Málaga autumn can deliver, that gradient is no small detail. Set out the edges of the surface with sharpened pegs and a taut string line, so you have a constant reference throughout the excavation.
2. The earthworks
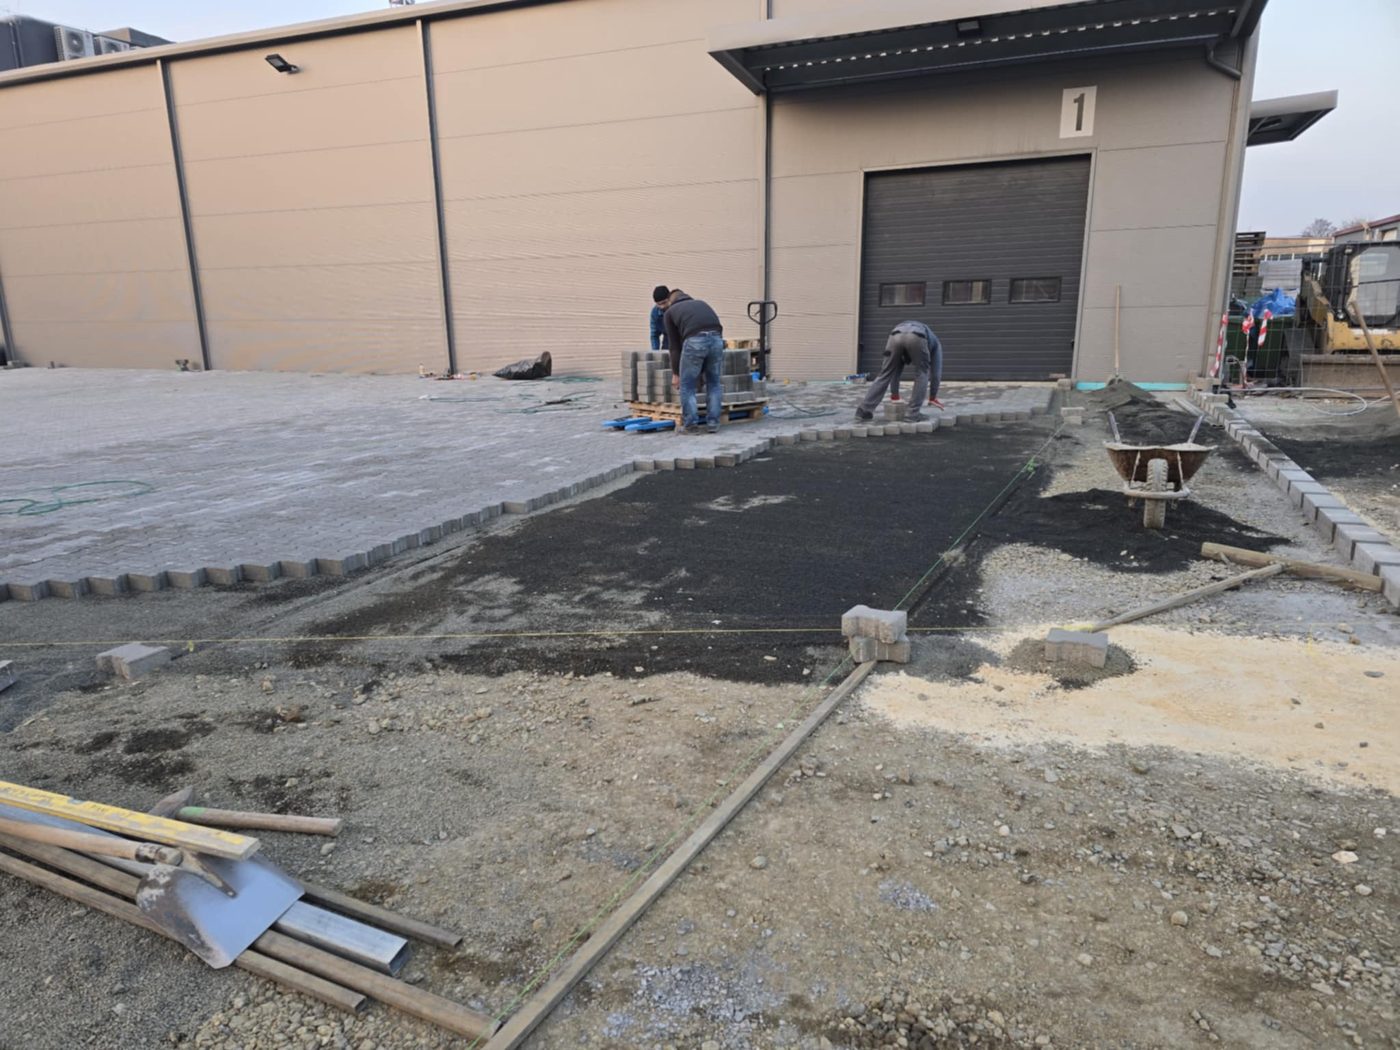
The topsoil must be removed entirely: its organic content means it will compress and settle over time. The excavation depth depends on the planned loading: 25–30 cm is enough for a pedestrian footpath, 35–45 cm for a surface cars will drive on. Shape the bottom of the excavation to the final fall at this stage already.
3. Building the sub-base
The base layer is built from crushed-stone sub-base (zahorra), typically 0/32 or 0/45 grading. It is spread and compacted in 10–15 cm layers with a plate compactor. Good compaction is not optional — it is the foundation of a long service life. A poorly compacted base will turn even the most beautiful pavement wavy within a few years.
4. Placing the kerbs
Block paving needs lateral restraint, otherwise the edges creep apart over time. The kerb units are bedded in concrete and secured from the outside with a concrete haunch. Many people skip or rush this step — yet a missing edge restraint is the most common cause of paving that spreads open. You can read more about these typical failures in our article on paver laying mistakes.
5. Screeding the bedding layer
On top of the crushed-stone base comes a finer bedding layer, 3–5 cm thick, typically of 2/5 mm grit or washed coarse sand with grit. It is screeded off with a straightedge to a perfectly smooth surface. Important: you must not step on this layer any more — the blocks are always laid working forward from the pavement already placed.
6. Laying the blocks
Laying starts from one corner of the surface, proceeding according to the chosen pattern. The blocks are placed with 3–5 mm joints — never butted tight, because the joint is essential for thermal movement and load distribution. Work from several pallets at once, mixing as you go, so any shade variation from manufacturing spreads evenly across the surface.
7. Compaction and jointing
Once every block is in place, the pavement is bedded into the laying course with a rubber-mat plate compactor. Then comes the jointing: dry, fine jointing sand is swept into the gaps, the compaction is repeated, and the surface is jointed again. The process is repeated until the joints are completely full.
Good block paving is 90% about the layers beneath it. What shows on the surface is only the tip of the iceberg.
If you carry out these seven steps patiently, resisting the urge to rush, you will get a pavement that keeps its flatness and its looks for decades. Almost all the most common failures stem from haste and neglected base layers.
Rather leave it to professionals? Call us on +34 613 656 443, write to oficina@adoquin.eu, or get an instant estimate with our price calculator — the site survey and measurement are free.
Planning a paving project?
Request a free site survey: we measure, advise, and within 1–2 working days you receive a detailed written quote.